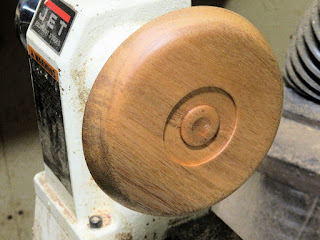
I enjoy making small bowls and plates for presents, but learning the process took longer than it needed to. I've decided to share photos of the steps I go through with some guiding explanations so that anyone else interested can pick things up faster than I did.
I'm going to start with the easiest wood possible to find and work with---a board:
Notice the plastic wrapping. I got a moderately priced, 4-foot mahogany board on sale at Menards. Mahogany is a relatively soft wood with a pleasant grain, a good choice for beginning.
After removing the plastic cover, I marked off individual plates, first marking a length equal to the width, and then drawing crossing diagonals. At the intersection, I used a spring-loaded punch to make a small indentation:
I use that indentation to mark the center of my plate first for marking with a compass:
I then cut the rough shape on a band saw. I have a cheap 10-inch saw, but for years I simply cut the corners off with my chop saw enough to make the initial turning smoother:
The next step is to center a 2-inch faceplate and attach it with two or four wood screws. I have a centering tool the same size as my lathe spindle, shown to the right, center point in the indentation I previously punched holds the faceplate in place while I put in the crews. Next, I mount the wood and faceplate on my lathe. Where the screws penetrate the wood will eventually be the middle of the bowl, so the screwholes will be removed as the bowl is formed.
The first cut on the bowl is on what will be the bowl base, creating a spot for an expanding lathe chuck to grip the bottom. I use calipers with a sharp edge to mark the width of the the chuck's jaws:
I then remove enough wood, about an eighth of an inch, so that the chuck will be able to grip it:
I then pretty-up the bottom a bit:
To make sure the chuck grips the wood well, I use a chisel I ground as a dovetail to undercut the edge a bit:
While the faceplate is attached, I go ahead and shape the bottom with a bowl gouge, sand it using progressively finer grades of sandpaper held against the spinning plate, then apply butcher-block oil and wax with a cloth held against the spinning plate:
While the plate is still on the lathe, I go ahead and attach the chuck to the bottom:
I then take them off the lathe, remove the screws holding the faceplate, and remount the plate with the chuck now attached to the spindle:
I use a bowl gouge to hog out the middle:
I then use a scraper to smooth and refine the shape:
Once again, I sand and finish with oil and wax.
Once I remove it, I bring it in the house for my wife to admire. Mahogany is light, and this plate weighed only 44 grams. I also like to work with walnut, a darker and denser wood:
In the past, I've also worked with multiple boards glued together. That way, you can get beautiful contrasts or a taller bowl. The process of shaping the bowl is pretty much the same. The challenge is in the original glue-up, making sure that the boards are flush, with no gaps that will be suddenly exposed as you shape your bowl.
I hope this how-to will prove helpful. Regardless, have fun and stay safe. You may have noticed the dust collector in the background of some photos. It was a great investment. And when I first started, I wore a plastic face-mask to protect me from broken bowl parts that flew across the room when I screwed up.


No comments:
Post a Comment